Starting a website is easy. There are lot of free services and tools are available to get started with. It only takes patience, interest and enthusiasm to start a website. In this article, you’ll learn how to start a website with GitHub, a well-known software repo.
About GitHub and Jekyll
GitHub is one of the widely used software repo by developers and organizations. It lets you host your code for free. You can create both public and private repositories to host your code. Public means, anyone can access it, download and suggest modifications if any. Private means, your code is just yours. GitHub isn’t just only for hosting your code, but also lets you create your own websites. It is made possible by Jekyll. Jekyll is like a framework written in Ruby which lets you create dynamic website out of static pages. It’s simple to use and easy to get started with. How is about a site with a sub-domain yourname.github.io? Well. Let’s begin.
STEP 1 : Signing up.
Go to http://github.com.
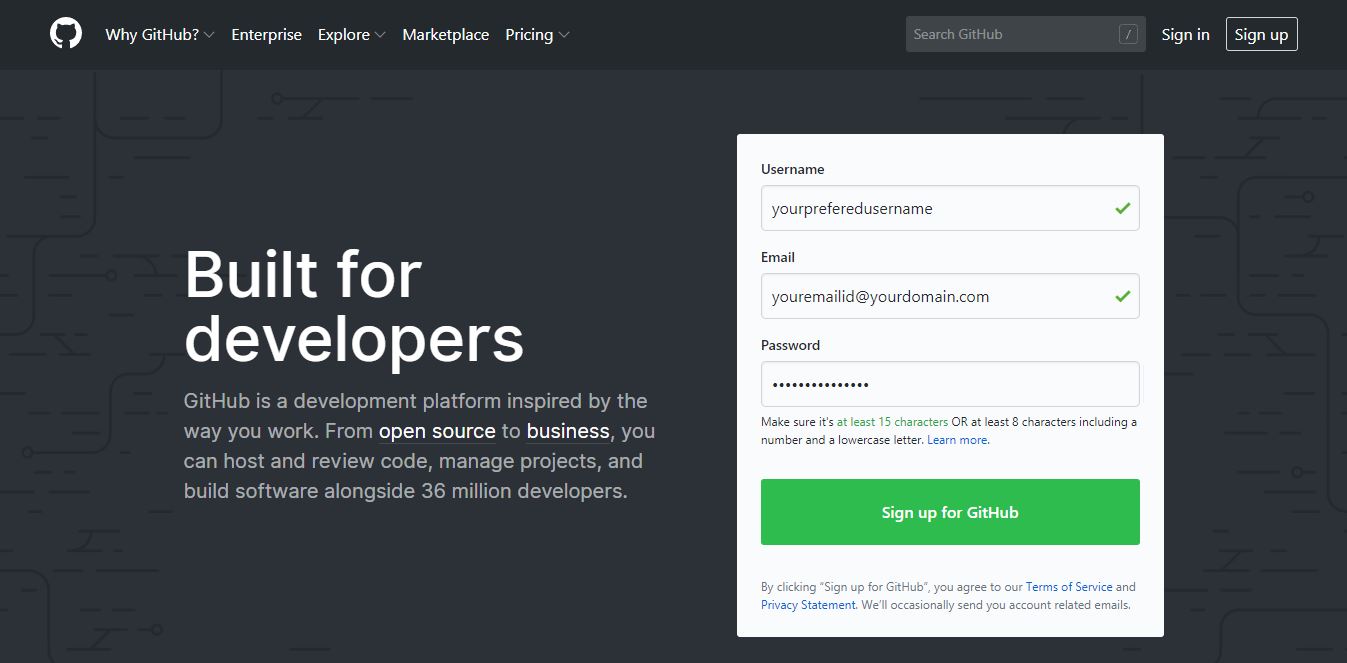
Click sign up. If you have an existing account, you can proceed to login page.
Signing up is simple as we do in Facebook or Google. Choose a username, enter a password and provide your email. That's it.
Check your email and verify your account.
STEP 2 : Creating a repository
Click the plus '+' icon on the top.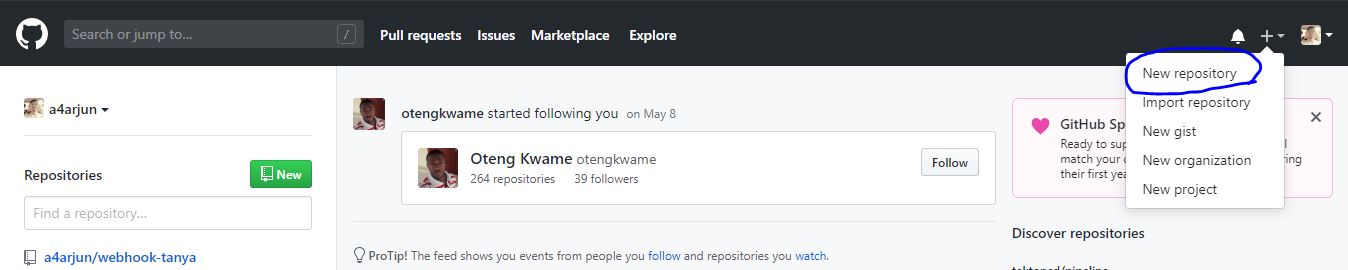
Choose New repository from the drop-down.
A repository is like a work folder or a project. You can give any name for your repository in usual cases. Like I said, it's just like a work folder(a unique work folder) .
But, in this case, we need to take an extra care while giving a name.
The name of our repo should be in the form such that : yourusername.github.io .
Yes. you must name your repo like this. For example, my username is "arjun". So, I must name my repo as "arjun.github.io".
I can't give a name like "mysite.github.io" or "website.github.io". But, it is possible to add a custom domain name later.
Am I confusing? ;-) .
STEP 3 : Creating website.
You will see multiple options after creating a repo like shown in the picture below.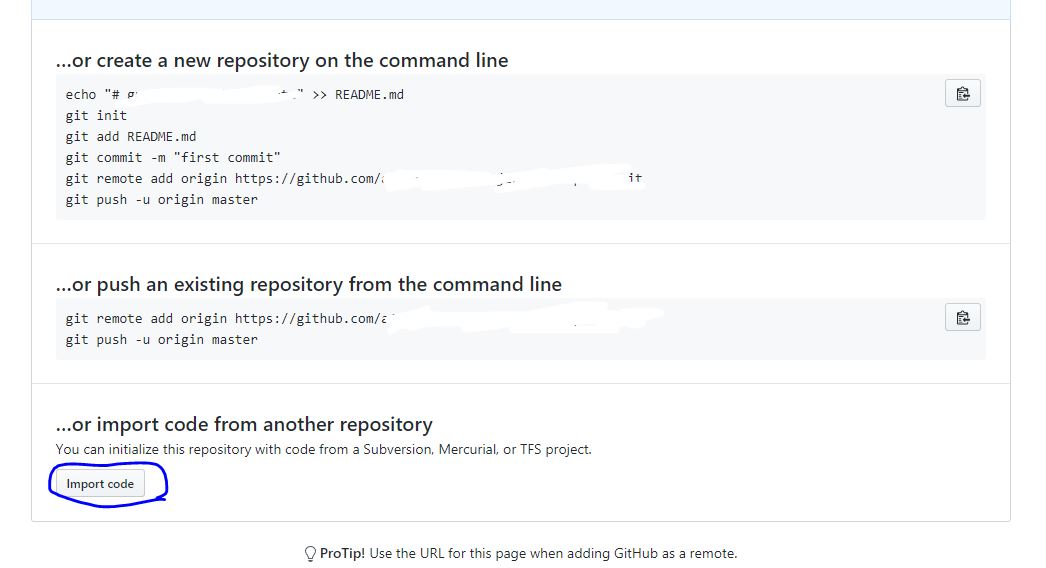
You can clone your existing website from another repo or you can upload your website from your computer via browser.
In this case, we're going to clone a website from an existing repo located at github.com/a4arjun/gracle-jekyll-template.
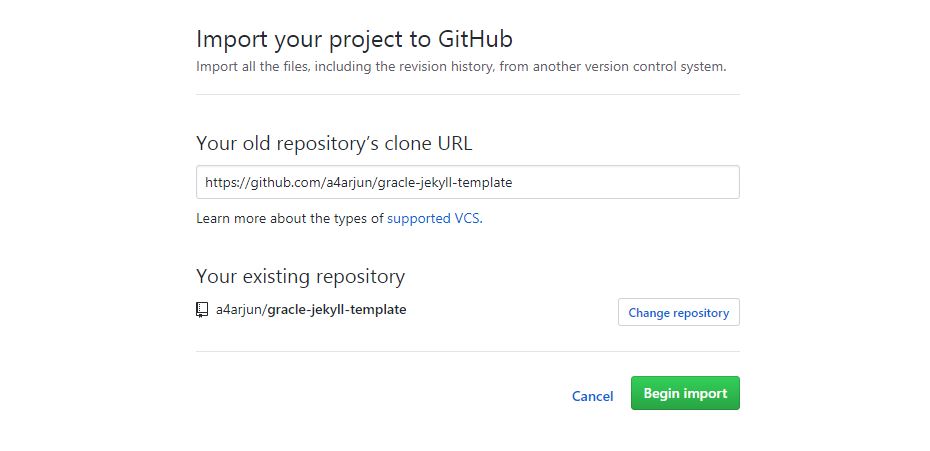
We can create our own, but let's discuss it later. To find Jekyll templates, you can use search bar of github (You can google such a way "jekyll templates").
You can use the theme I've created. It’s free for personal and commercial purposes. It's bootstrap and originally designed by Startbootstrap.
Now you can visit your website by http://yourusername.github.io
STEP 4 : Customizing
Wait! What? No styles and working urls? Looking weird? Don't worry. Open your repo. On that, open the file named “config.yml” and change the paths accordingly. Reload your site.In future, you'll learn about adding pages and posts, creating your own templates for your Jekyll website, more advanced functions etc..
Thanks for reading.